
We are right in the middle of summer, so the trees around us are full of bright green leaves. Explore the colorful pigments leaves have hidden inside of them. Go outside and collect some leaves you find interesting, then come back here and learn how to experiment with leaf chromatography.
Materials to Collect
- Leaves – spinach, kale, plants outside
- Nail polish remover or rubbing alcohol
- Tall cups
- Paper towel or coffee filter cut into long, 2-inch wide strips
- Tape
- A stick
Don’t Pick That!: Please please please do not use poison ivy or poison oak for this activity!
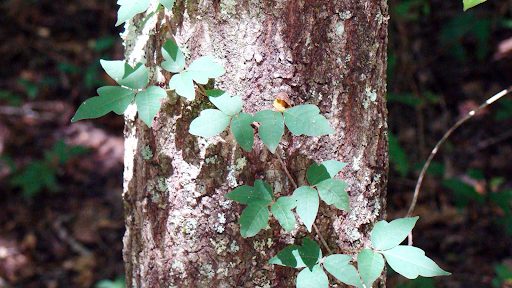
(Photo of poison ivy vine climbing a tree – HowStuffWorks.com)
Check out this guide and this UConn poison ivy guide for identifying and dealing with poison ivy, poison oak, and poison sumac. Click here for a more general don’t touch/don’t eat that plant guide for North America. I would recommend sticking to leaves from trees you know or leaves from your groceries for this activity. If you’re like me, the above picture is enough to make you feel itchy for the rest of the day!
Try it out!
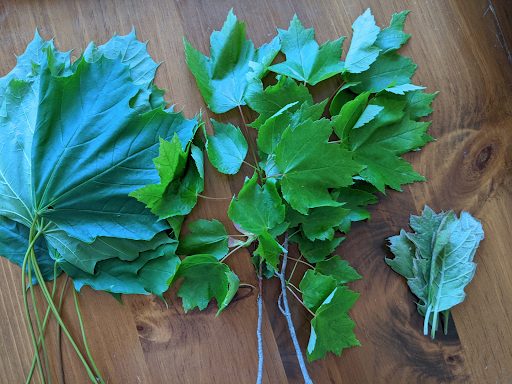
(Photo: The leaves I picked for the experiment today – you don’t need this many!)
Go find some leaves that you are curious about! I chose (what I believe to be) two different types of maple leaves (on the left) and oak leaves (on the right). You can also explore some leaves you might have in your fridge like spinach or kale!
- Tear those leaves into tiny pieces and put them in a cup – make sure you have a different cup for each leaf type!
- Mash the leaves with a spoon or a mortar and pestle. You want to break them up as much as possible so you can explore the pigments, or color molecules, that they have inside the leaves.
- Add nail polish remover or rubbing alcohol, whichever you happen to have on hand, just enough to cover the leaves in liquid.
- Now is where you have two options! You can either dip a strip of paper towel into the liquid right now, or you can put a cover on those cups and let the leaf pieces break down even more overnight. Or try both!

(Photo of experiment set up with paper towels dipped into nail polish remover/rubbing alcohol and leaf pieces, taped to a stick above the cups – note the darker liquid color because the leaves sat in the liquid overnight)
- If you’re continuing right now, or if it is the next day: carefully place a paper towel strip into the leaf-liquid so that it is just touching the liquid.
- Rest a stick on the top of your cup and tape the paper towel to this stick to hold the paper towel in place.
- Wait for 15-20 minutes then check back and see what you notice! (I didn’t notice anything except for a faint green creeping up my paper towels. From here, I removed the paper towel strips and let my experiment hang out, covered, overnight)
- If you wait overnight, what differences do you notice from what you set up the day before? The next morning, I put new paper towel strips in the liquid for 20 minutes and saw some beautiful results!
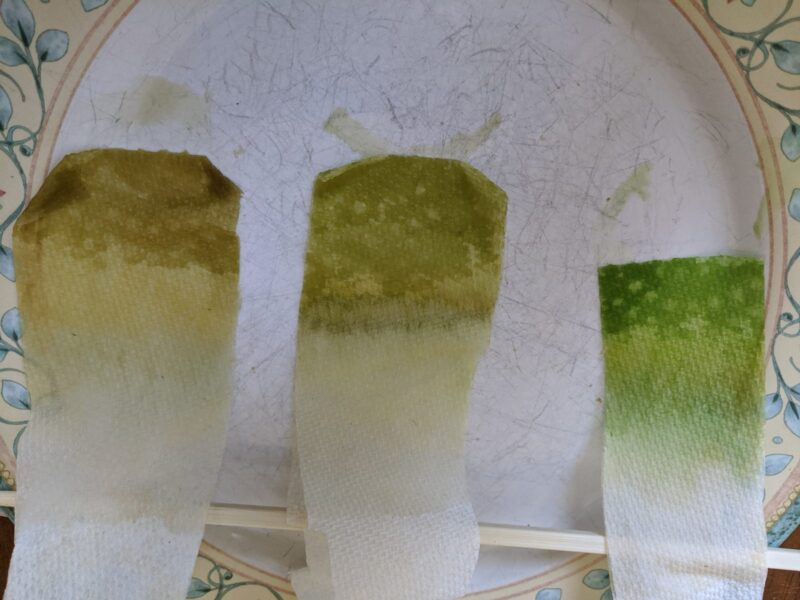
(Photo of chromatography results showing different bands of color from the leaves!)
What is the Science?
Leaf chromatography is an experiment that allows us to see the colorful pigments that leaves have hidden inside them. The green leaf color is the chlorophyll, which helps plants absorb the yellow and blue wavelengths of light. Chlorophyll is the main pigment used for photosynthesis, or harvesting energy from sunlight! Those leaves have so much chlorophyll in them that it hides the other pigments from view. Some of these other pigments are carotenoids (yellow, orange, red, or brown in color; absorb blue light) and anthocyanin (pink-red colored; absorb blue-green light) – these two pigments help plants absorb additional wavelengths of light and help plants deal with some of the stress that sunlight can cause (Harvard Forest). In the fall, the chlorophyll in leaves breaks down and the nutrients are reabsorbed by the plant, leaving behind the other leaf pigments – this is why we get to see so many gorgeous red, orange, and yellow trees! By breaking down the leaves and separating out the pigments, we’re able to get a sneak preview of the different colors we might see on these trees in the fall!
But wait a minute – how did we separate out those pigments?! That paper towel that you dipped into the leafy-liquid started to absorb that liquid. The liquid travelled up the paper towel in a process called capillary action – the liquid filled tiny holes in the paper towel and gradually climbed up the paper towel. While the liquid was climbing the paper towel, it took plant pigments with it! The plant pigments are different sizes and shapes so they were carried different distances up the paper towel by the liquid.
If you didn’t see any colors in the 20 minutes that you had the paper towel in the liquid (don’t worry, I only saw a little bit of a color change!), remove the paper towels and cover the liquid overnight – this will give the leaves some time to release more pigments. You can try the same experiment tomorrow with fresh paper towel strips and see if you notice any differences!
Ask Your Young Scientists
- What differences do you notice in the leaves you collected?
- What colors are the leaves you collected?
- Why do you think we rip the leaves into little pieces?
- What do you notice as the leaf pieces sit in the nail polish remover/rubbing alcohol?
- What is happening when we dip the paper towel into the liquid?
- What colors do you see at the end of 20 minutes?
- What differences do you notice in the liquid that sat overnight?
- Where/when have we seen these colors before?
More to Explore
Try using different colored leaves! Red cabbage is another great leaf to try, it gets its color from anthocyanins – a really neat pigment that changes color based on pH! (To learn more about cabbage juice, check out our blog!)- Link to Andrew and Samantha’s cabbage juice SAP video
Science at Play: Pen Chromatography – if you enjoyed this activity, my colleagues Aoife Ryle and Andrew Fotta have another chromatography experiment that you can try as well!
Seek by iNaturalist – excellent app for kids to help identify plants, insects, fungi and animals
iNaturalist – great app for older kids and adults that allows users to help you identify the plants, animals, insects, and fungi that you took pictures of
LeafSnap – I have not tried this app yet, but it can identify trees using pictures of their leaves – perfect for this activity if you’re curious about what tree you took leaves from!
Share photos or videos of your leaf chromatography with us by tagging us @CTScienceCenter and #ScienceAtPlay !

Jessie Scott is a STEM Educator who enjoys encouraging students’ enthusiasm for science. She teaches classes to students visiting the Science Center and brings STEM lessons to schools across Connecticut. Jessie completed her Master of Science degree in Microbiology at Dartmouth College and worked as a science educator at the Montshire Museum of Science before coming to the Connecticut Science Center. Her scientific interests are: biology – how living things have adapted different strategies to survive in their environments, insects, and plants. In her free time, Jessie likes to go rock climbing, hiking, and skiing.